Program your Tiva Launchpad with Rust!
Introduction
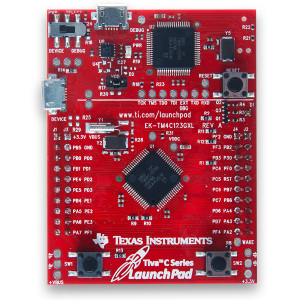
I spent some time yesterday trying to get Rust code running on the Texas Instruments Tiva Launchpad. There are some excellent resources out there which will help you get this done; the most useful one for me was http://antoinealb.net/programming/2015/05/01/rust-on-arm-microcontroller.html. What I am writing down here is basically the same process (with a few simplifications).
There are two other wonderful documents related to embedded system programming using Rust: the Copper book and the Discovery book.
Install Rustup
Follow the instructions here to install Rustup, the Rust toolchain installer (my development machine runs Xubuntu 16.04). This will also install the “stable” version of the Rust compiler and also the Rust package manager, “cargo”.
You can test your installation like this:
pramodein@i33:~$ rustc -v --version
rustc 1.13.0 (2c6933acc 2016-11-07)
binary: rustc
commit-hash: 2c6933acc05c61e041be764cb1331f6281993f3f
commit-date: 2016-11-07
host: x86_64-unknown-linux-gnu
release: 1.13.0
pramodein@i33:~$
The Rust toolchain comes in two flavours: the “stable” and the “nightly”. Many of the features we need to do embedded systems programming in Rust are enabled only in “nightly”; so the next step is to install it.
Install Rust “nightly”
Using “rustup”, it is a breeze! Just do:
rustup default nightly
This will download the current “nightly” version and make it the default. We can verify this by doing:
pramodein@i33:~$ rustc -v --version
rustc 1.15.0-nightly (daf8c1dfc 2016-12-05)
binary: rustc
commit-hash: daf8c1dfce3b448fc581cc319f64632ec22bd0e1
commit-date: 2016-12-05
host: x86_64-unknown-linux-gnu
release: 1.15.0-nightly
LLVM version: 3.9
pramodein@i33:~$
It is easy to change the compiler back to the “stable” version; just do:
rustup default stable
We can switch back to the “nightly” any time:
rustup default nightly
Install the GNU toolchain
Install the GNU toolchain for ARM Cortex-M processors from https://launchpad.net/gcc-arm-embedded.
Two approaches to programming the Tiva Launchpad
The Cortex-M processor on the Tiva Launchpad can be programmed by writing directly to memory mapped peripheral registers.
Another option is to program at a slightly higher level by using the Hardware Abstraction Layer provided by most microcontroller manufacturers; the HAL is written in C.
The Rust code which we are planning to write will not do direct register manipulation; instead, it will simply call the C functions which are part of the DriverLib made available by Texas Instruments.
Test C code written using driverlib
As the first step, we will make sure that we are able to compile and run plain C code written using the TI driverlib.
Here is what you need to do:
git clone http://github.com/pcein/rust-launchpad
cd rust-launchpad/tivaware/driverlib
make # this will build the driverlib
cd ../../blinky-c
./build
lm4flash blinky.bin # run as super user
The “lm4flash” utility used for flashing the launchpad can be obtained from https://github.com/utzig/lm4tools.
You will see the red LED on the board flashing.
Rewrite blinky.c in Rust
We will now rewrite blinky.c in Rust. The idea is to write a few simple Rust wrapper functions (defined in gpio.rs) which will invoke the driverlib functions written in C.
The “main” function (defined in blinky.rs) is defined in Rust - it gets called from the startup code present in startup_gcc.c.
In order to compile our Rust code, we need to first compile the Rust “core” library from source. The functions in the “core” library do not have any Operating System dependency - they will easily run on the “bare machine”.
Building Rust “core” from source
The “core” that you build should have the exact same version as the Rust “nightly” compiler which we are using.
As the first step, find out the git commit hash associated with with “nightly” by running “rustc -v –version”; here is the output I got:
rustc 1.15.0-nightly (daf8c1dfc 2016-12-05)
binary: rustc
commit-hash: daf8c1dfce3b448fc581cc319f64632ec22bd0e1
commit-date: 2016-12-05
host: x86_64-unknown-linux-gnu
release: 1.15.0-nightly
LLVM version: 3.9
The commit hash is daf8c1dfce3b448fc581cc319f64632ec22bd0e1.
Let us clone the Rust source from github and checkout the version which matches the above commit hash (make sure that your current directory is “rust-launchpad/blinky-rust”):
git clone https://github.com/rust-lang/rust
cd rust; git checkout daf8c1dfce3b448fc581cc319f64632ec22bd0e1
And now, let’s do the build (under rust-launchpad/blinky-rust):
./buildcore
You should find a file “libcore.rlib” under “libcore-thumbv7m” and “librustc_bitflags.rlib” under “librustc_bitflags-thumbv7m”.
Building “blinky.rs”
It is time to build and flash our blinky app:
./build
lm4flash main.bin